
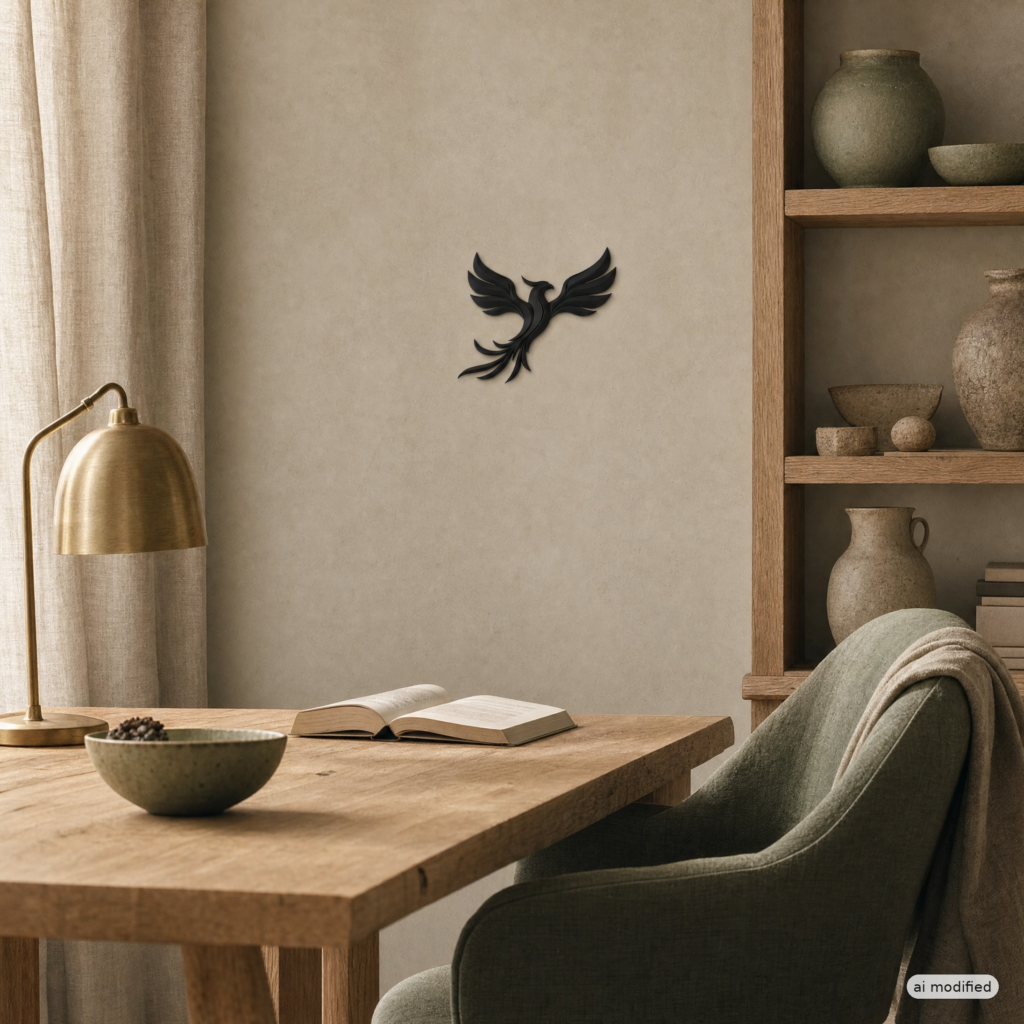
No more blurred shadows: how to light the black phoenix so it emerges from the wall
When you hang a black decoration on a light-colored wall, the risk is a flat stain instead of a sculptural presence. The problem is not the color: it is the light. Without grazing lighting that skims its profile, even the most elegant silhouette blends into the background, and with it depth, character, and meaning are lost.
The solution is concrete: a light source positioned to the side or from below, at close range, that turns the matte surface into a bas-relief capable of casting shadow and volume.
Why matte black needs grazing light
Black absorbs light instead of reflecting it. To make it emerge, you need lighting that emphasizes its physical relief, not one that hits it head-on.
A decoration in matte black PLA, such as a wall-mounted phoenix in black bioplastic, has no reflections to make it shine. Its presence depends entirely on the contrast with the wall and the shadow it casts.
Diffused light from above — that of a central chandelier or ceiling spotlights — flattens everything. It illuminates the wall and the object uniformly, canceling out the relief. The result is a two-dimensional silhouette, without breath.
Raking light, on the other hand, comes from the side or from below. It skims the surface, enhances its minimal thickness (even just 1.5 cm), and creates a cast shadow on the wall. That phoenix, 23 cm wide by 19.5 cm high, becomes a sculptural element, no longer just a hanging design.
- Light wall (white, light gray, taupe): maximum chromatic contrast
- Raking light from the side or below: contrast of relief and shadow
- Light source distance 30-40 cm: optimal angle for a sharp shadow
How to mount and light the phoenix: step-by-step procedure
Precise mounting and targeted lighting turn a decoration into a focal point. Just a few concrete steps are enough.
Mounting and lighting procedure
- Choose the wall: Light, smooth surface without overly pronounced texture. Avoid dark walls or walls with patterned wallpaper that fragments the silhouette.
- Calculate the height: Position the phoenix at eye level when standing (about 160-170 cm from the floor) if the space is an entryway or hallway. Lower it to 140-150 cm if you will view it from a seated position, as in a home office.
- Use the drilling template: The phoenix comes with a template that ensures precision. Mark the two mounting points, drill with a 6 mm bit, insert the wall plugs, and screw in.
- Position the light source: Place an adjustable LED spotlight or a small wall lamp 30-40 cm away, to the side or from below. The ideal angle is about 30-45 degrees relative to the wall.
- Check the shadow: Turn on the light and observe the projected shadow. It should be sharp but not too long. Adjust the distance and angle until you achieve a relief effect without glare.
The choice of lamp is crucial. A 3-5 watt LED spotlight with warm light (2700-3000 K) is sufficient. Avoid cool color temperatures (above 4000 K): they harden the black and make it look gray.
If you do not want to install a wall spotlight, use an adhesive LED strip placed on the lower edge of a shelf or low cabinet, facing upward. The effect will be more dramatic, with the shadow stretching toward the ceiling.
Two environmental variants: entryway and home office
Each environment calls for a different approach. The entrance seeks immediate impact, the office seeks concentration and inspiration.
Entrance: symbolic impact from the first glance
In the entrance, the phoenix must be visible as soon as the door opens. Mount it on the front wall, above a narrow console or a wall-mounted coat rack.
The ideal lighting is a small table lamp placed on the console, with an adjustable shade. The light rises from below, grazes the silhouette, and casts the shadow upward. The effect is welcoming and protective: a domestic talisman that marks the boundary between outside and inside.
Pair the phoenix with warm materials: natural wood for the console, a ceramic bowl in burnt-earth color, a green plant in a terracotta pot. Matte black dialogues with the wood and the green without competing.
| Element | Entrance | Home office |
|---|---|---|
| Mounting height | 160-170 cm | 140-150 cm |
| Light source | Table lamp from below | Side wall spotlight |
| Shadow effect | Upward, theatrical | Side, discreet |
| Pairings | Console, mirror, plant | Desk, bookcase, notebook |
Home office: visual resilience during professional challenges
In the home office, the phoenix should be mounted behind the desk, on the wall you face when working. Not above the computer screen (too high), but to the side, where your gaze rests during breaks.
The best lighting is an adjustable wall spotlight, positioned 40 cm to the left or right of the decoration. The light comes from the side, creating a sharp but unobtrusive shadow. During video calls, the phoenix remains visible in the background, elegant and discreet.
Abbina la decorazione simbolica in PLA nero a una libreria a giorno con ripiani in legno chiaro, a quaderni rilegati in tela, a una lampada da scrivania in metallo spazzolato. Il nero opaco assorbe il caos visivo, restituisce ordine e concentrazione.
Errori da evitare: quando la luce tradisce il nero
Tre errori comuni annullano l’effetto scultoreo. Riconoscerli è il primo passo per evitarli.
Parete troppo scura. Su grigio antracite o blu notte il nero si confonde. Serve almeno un contrasto di tre toni sulla scala cromatica. Se ami le pareti scure, crea un riquadro chiaro (bianco sporco, greige) solo nell’area della fenice.
Luce diffusa dall’alto. Lampadari centrali e faretti a soffitto appiattiscono. Se non puoi aggiungere una fonte radente, spegni la luce principale e accendi una lampada da terra orientata verso la parete, a 1-1,5 metri di distanza.
Troppi elementi circostanti. Quadri, mensole, poster: ogni oggetto vicino ruba attenzione. La fenice ha bisogno di respiro. Lascia almeno 50 cm di parete vuota su ogni lato.
Fotografa la parete con lo smartphone in modalità ritratto. Se la fenice non emerge nitida dallo sfondo, il contrasto non è sufficiente. Aggiungi luce o cambia parete.
Quando il nero opaco diventa bassorilievo
Una decorazione nera su parete chiara, illuminata con cura, non è più un oggetto appeso. È un segno inciso nello spazio, un gesto che trasforma la superficie verticale in un piano di profondità.
La fenice, con le ali aperte e la coda a fiamme, porta nella stanza il movimento della risalita. Ma quel movimento emerge solo se la luce lo scolpisce, se l’ombra lo àncora, se il contrasto lo libera dall’appiattimento.
Non serve un impianto complesso. Basta una lampada nel posto giusto, un’angolazione studiata, un occhio attento al dialogo tra luce e materia. Il nero opaco, quando è illuminato con rispetto, restituisce eleganza, forza interiore, presenza silenziosa.
E la parete, da superficie neutra, diventa testimone di una rinascita.
Q&A
Why does a matte black decoration appear flat on the wall?
Black absorbs light instead of reflecting it, so without lighting that highlights its physical relief, the silhouette blends into the background. Diffused light from above flattens the wall and the object, canceling out depth and cast shadow.
What kind of light is needed to bring out the black phoenix?
A grazing light is needed, positioned to the side or from below, that skims the surface and casts a shadow on the wall. The optimal distance of the light source is 30-40 cm to achieve a sharp shadow.
Which wall should be chosen to mount the black phoenix?
A light-colored, smooth surface without pronounced textures is best, so the color contrast is maximized. Dark walls or walls with patterned wallpaper that fragment the silhouette should be avoided.
At what height should the wall phoenix be positioned?
If you will view it standing, as in an entryway or hallway, position it at eye level, about 160-170 cm from the floor. If you will view it seated, as in a home office, lower it to 140-150 cm.
How do you mount the black phoenix precisely?
The phoenix comes with a drilling template that ensures precision: mark the two fastening points, drill with a 6 mm bit, insert the anchors and screw in. The minimum thickness of 1.5 cm is enough to create relief with grazing light.